
How to Artfully Use Your Pencil
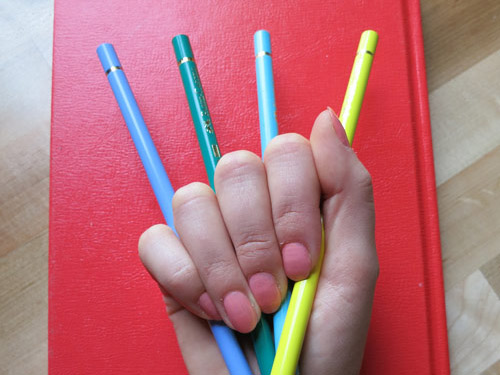
How do you hold a pencil? Sounds trivial, right? But artists have more than one way of holding a pencil. Today, I’ll tell you a bit about that. And I’ll also show you how to scribble some strokes. All while paying attention only to your paper. Not to your phone, not to the TV. So keep on reading…

In my previous post, I was talking about the therapeutic effects of holding a pencil in your hand. Today I’m going to talk about how to actually hold a pencil and what kind of strokes to obtain, depending on angle, pressure and style of stroke. The combinations are countless, but I’ll show you some basic options. From there, feel free to improvise. First of all, the most important way to hold your pencil correctly is to put down your phone. And don’t look at it while you’re grabbing the pencil. In fact, put your phone on mute and shove it in a drawer (just don’t forget which drawer). Oops, this contradicts the fact that you are probably reading this article from your phone, right now. I forgive you this time. Read along, and then you can hide your phone away.

The basic way of holding the pencil… well… is to just hold it like you are writing. At an angle.

Another way of holding the pencil is by keeping it so inclined that it is almost parallel to the paper. That will make the line very wide, covering a lot of white.

Or, you could hold the pencil vertically, so that only the tip of the pencil will touch the paper. This is useful if you want to create dots.

Ok, now what’s the secret about pressure? The more pressure you apply, the more intense the color will look on the paper. Pretty simple, right?

But the paper itself has a certain tolerance to how much color it can take from a pencil. Some papers, that are more porous, can take more pigment. But most of the time, if you apply a lot of pressure from the beginning, it will be hard to add another color on top. Pencils are not as easy to mix as… let’s say watercolor. If you are looking to combine colors, don’t put pressure. Have patience, add one layer at a time, pressing lightly on the drawing surface. If you start getting anxious about finishing faster, take a break, do something else and revisit later.

Now let’s talk about basic pencil strokes:
Lines: A line is the simplest pencil stroke. But because we can combine the angle of the pencil and the pressure, the line can get various shapes and forms. Lines can become straight or wavy, curly… etc.
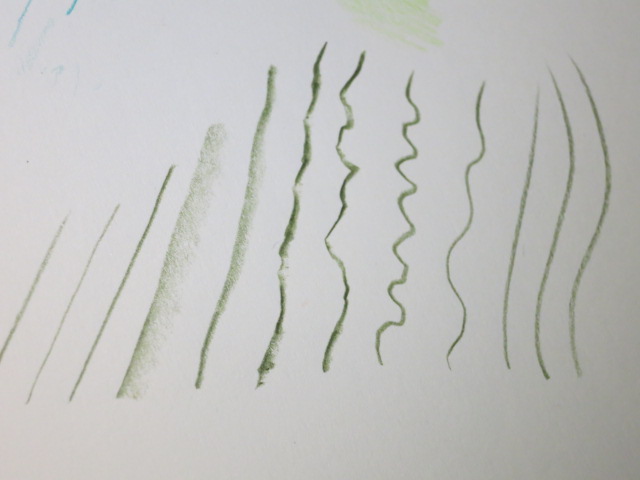
Lines can be spaced apart from each other or be very close. The closer they are, the darker the colored surface. It’s a matter of optics.

Hatching and Crosshatching: You are basically drawing fast parallel lines with your pencil across the paper, with or without lifting the pencil while you are drawing. If you don’t lift the pencil, you’ll get faster results. This is hatching:

And this is crosshatching:
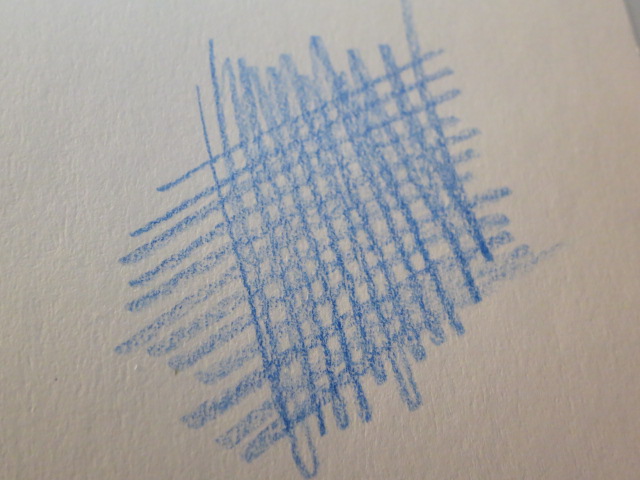
There are variations to this: if you make the lines close enough, then you’ll cover the entire white surface. If you leave spaces between the lines, then you’ll get a lighter version.

There is an option to also make the lines curved, which will create volume.

Circles: Another way to color a surface is by using a circular motion. Same rules apply: maintain contact with the paper, adjust the pressure to obtain the desired effect. And also you can vary the angle of the pencil. You’ll get quite some interesting results.

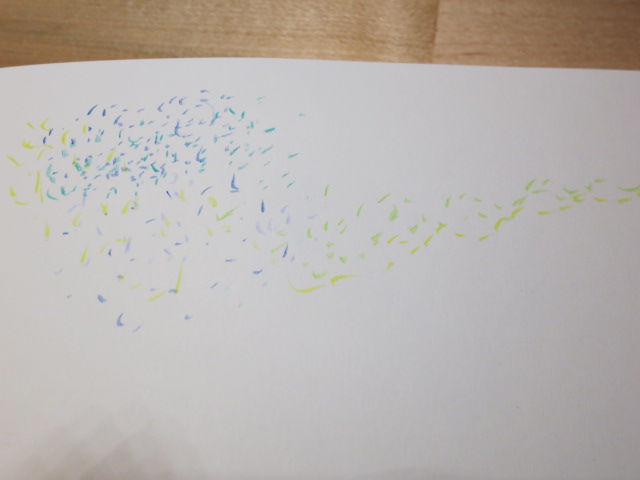
Dots: Holding your pencil vertically and tapping the paper will give you dots. Simple as that! Put them close to each other and you can make quite a masterpiece, like Seurat and his pointillist paintings. You’ll need a lot of time and patience, though. In the example below, I rushed to get the dots done fast, so they look more like short lines, but I hope you get my point… POINT…
On top of all these, comes the blending technique. Blenders can be dry (like paper tortillons, or the Prismacolor Blender) or wet (a sort of a marker, but colorless, and with a solvent that nicely spreads and blends the colors). If you want smooth transitions between colors, get a wet blender. It makes the colors spread evenly into the paper pores and cover all the white spots.

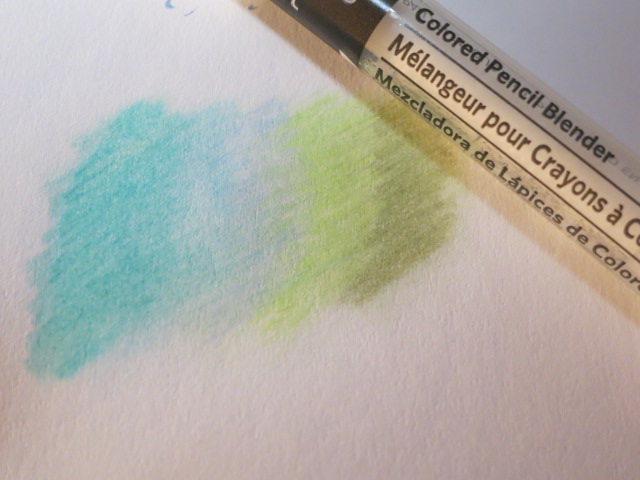
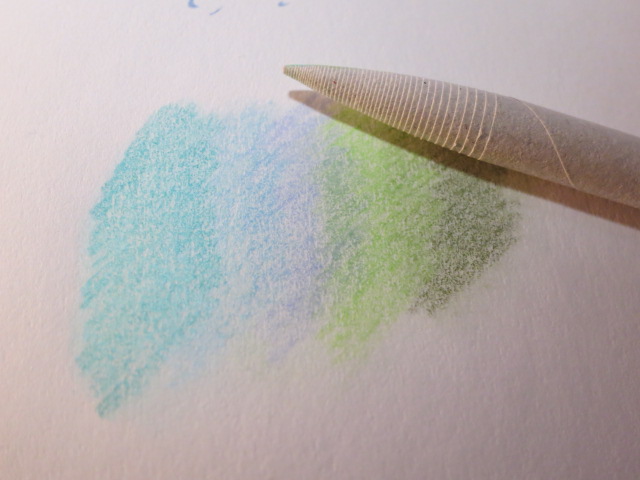
If you prefer the more gritty-pencil-like look, then go for the dry blenders. They blend the colors nicely, but still leave some white breathing through the pencil strokes.
I showed some of my favorite blenders and coloring pencils in this article. You can combine any colors you’d like, following these techniques.
Are you delighted about your newly learned tricks? Then I hope to see you back, reading more of my posts. My next topic will be the emotion of colors and how we can take advantage of that. Colors evoke feelings. They send a subliminal message. Our eyes and brains interpret them in certain ways. Media and advertising know this and take full advantage of it. We are flooded daily with ads and news that apply all sorts of visual gimmicks. I’ll be back!
If you want to see some of my artwork in progress, follow my Instagram page:


What an interesting post, Andreea! I learned a lot of things. You explained the coloring steps so well. I also like the photos. They help me understand the coloring process much easier. Thank you very much for sharing with us your knowledge.
Thanks for reading my article, Alexandra. Glad you liked it!